From the archive
How to Draw a Sitting Cat With a Pencil and Three Simple Shapes
Prefer Family & Pets on GoogleSee more of our stories in your results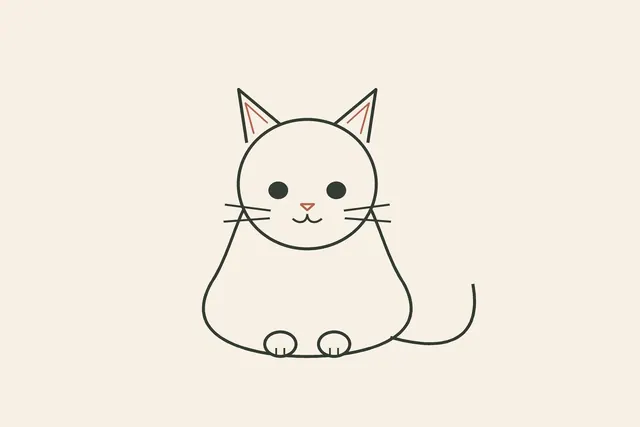
A sitting cat can look complicated while it moves around the room. Start with the shapes that stay recognizable when it settles down. Draw a circle for the head, a pear for the body and a curved line for the tail. You can try the shapes even if you haven’t drawn anything in a while.
Find a sheet of paper and a pencil with an eraser. For a cat to look at, open the Met’s copy of Steinlen’s Cats: Pictures without Words and look for a sitting pose. See which parts of its outline are wider or narrower, then go back to your page and draw your own cat.
Step 1: Draw the head circle
Start in the upper middle of the page and draw a circle about as wide as your palm. Draw it lightly. Every line in the first three steps is a guide, and a light line erases cleanly. Pressing hard makes the first wobble permanent, so a loose grip helps.
Next add two light guide lines inside the circle, one vertical through the middle and one horizontal just below halfway. Eyes go on the horizontal line, one on each side of the vertical, and a small triangle for the nose goes just below the crossing. Centered features make the face read as a cat's even when everything else is rough.
Step 2: Add the pear-shaped body
A pear has a narrow top and a wide bottom, which is close to the outline of a seated cat: narrow at the shoulders, wide where the haunches rest on the ground. Draw the pear so its narrow top tucks just under the head circle, overlapping it by a finger's width. Let the wide bottom run toward the bottom of the page.
Make the pear roughly one and a half to two times as tall as the head. Much shorter and the cat looks like a head resting on a cushion. Once the shape is in, rub out the pear lines that run through the head circle, so the head sits in front of the body.
Step 3: Curve the tail
The tail is one line, drawn in a single stroke. Start at the base of the pear on whichever side you choose, sweep it out along the ground, and let it curl upward at the tip. Move the whole arm, not just the fingers, so the curve stays even. If the first try wobbles, draw a second beside it and keep the one you prefer. Two tails on the page are fine. Erasing is part of the exercise, not a penalty.
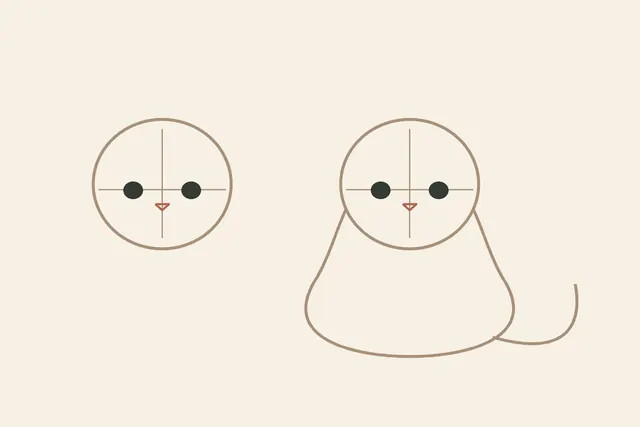
Tail length is the first thing a child can change on purpose. A tail that wraps around the front paws makes a tidy, settled cat. A tail that stretches out behind makes a cat that looks ready to get up. Decide before drawing, then see whether the page agrees.
Step 4: Place ears and paws
Ears sit on the head circle, not floating above it. Draw one triangle on each upper side, with the outer edge continuing the circle's curve and the point rising about a third of the head's height. Draw an inner triangle inside each if you like. Lean both ears slightly outward, so the pair looks relaxed rather than stiff.
Front paws are two small ovals at the bottom of the pear, side by side, with their tops tucked slightly under the body line. Add a short curved line or two for toes. Back paws, if you want them, peek out as two flatter ovals at the outer edges of the base, where the haunches sit. Keep every paw small. Oversized paws make a cat look as if it is wearing slippers.
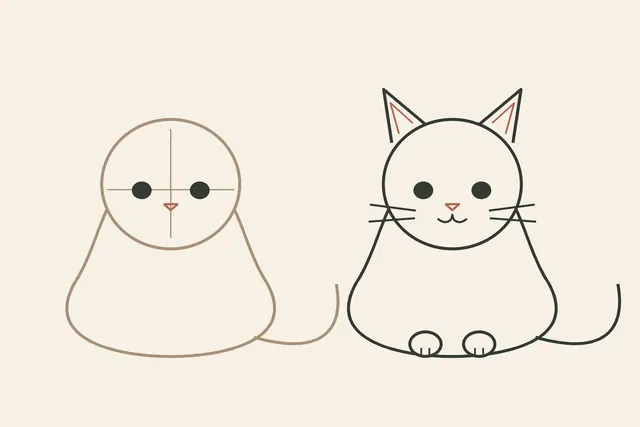
Check spacing and fix common shapes
Hold the page at arm's length, or turn it upside down, and check three distances. First, the head's width against the body's widest point: the body should be wider, by roughly half again. Second, the gap between the eyes: about one eye's width. Third, the space between the front paws: about one paw's width or less. Upside down, a drawing stops looking like a cat and starts looking like shapes, which makes uneven spacing easier to see.
Most problems trace back to one shape. If the cat looks like a snowman, the pear is too round and too short, so lengthen it and widen the base. If the head looks tiny, redraw a larger circle over it. If the cat seems to lean backward, the narrow top of the pear has slid behind the head, so tuck it forward. If the face looks off, check that both eyes sit on the horizontal guide, since a tilted pair changes the whole expression.
The method has limits. It suits an upright cat and works poorly for one curled in a ball or stretched out flat, where there is no pear to find. A very fluffy cat hides its outline under fur, so draw the pear first, then add a bumpy edge outside it. Guide lines will make the page look messy. That is expected, and they can stay.
Change the pose, then make it a particular cat
To change the pose, keep the circle and pear but move one thing. Tilt the head circle slightly to one side and let the pear lean the opposite way, for a cat that is listening. Or draw the cat in three-quarter view, with the head turned toward the viewer and the body angled away. Change only one thing per drawing. Two changes at once make it hard to tell which one worked.
To make the drawing look like a particular cat, choose one or two details from the real animal and change only those. Ears are a good start: rounder, larger, or folded at the tip. Markings come next, such as a white bib on the pear, stripes across the tail, or a dark patch around one eye. Tail shape also changes the character, long and thin on one cat, short and bushy on another.
Draw one plain cat, then a second with a single pose change and one detail from a real cat, and set them side by side. The adult supplies paper and a pencil, then draws their own cat and resists correcting anyone else's. How much help a particular child wants will vary, and that is worth asking rather than assuming. The exercise is a poor fit for a child who is frustrated by guide lines. For that child, skip the guides and draw only a circle and a pear, then decide together what they could become.